Thursday, September 23, 2010

Diaper Cakes


These make such wonderful baby shower gifts! They are great conversation pieces too! Here are the fun and easy steps:

First start with these supplies:
  • 60 Diapers (depending on how large or small you want the cake to be)
  • 3-4 yards of decorative ribbon
  • 3-5 small toys, blankets, hats, socks, etc.
  • Circular cardboard cutout
  • 1 small wooden dowel
  • Hot glue/gun
  • 3 yards of white tulle
  • 60 small hair elastics
  • 10 large newspaper elastics
  • 30 small decorative flowers or bows
  1. Take each diaper and roll from the bottom to the top and secure with a rubber-band in the center.
  2. Take 7 diapers and hold them together to form a circle and secure them with a large newspaper rubber band in the center. (this completes the top layer of the cake)
  3. Repeat step #2 and add an additional 10 diapers to form a larger circle. (this completes the 2nd level)
  4. Repeat step #2 and #3 and add an additional 16 diapers to form the largest circle. (this completes the bottom layer)
  5. Take the cardboard cutout and begin placing the bottom diaper layer and secure it to the cutout with a small amount of hot glue. (We want these diapers to be usable)
  6. Insert the wooden dowel in the center of the bottom layer and place the 2nd layer through the dowel and on top of the bottom layer.
  7. Add the top layer to the bottom 2 layers. (Make sure the dowel goes from the bottom layer straight through the top layer to ensure the cake won't topple over. Remove any extra length on the dowel)
  8. Apply the to tulle to each layer on the exterior and secure with hot glue and another large rubber band. Cut off any excess tulle.
  9. Use the hot glue to add the ribbon to the center of each layer.
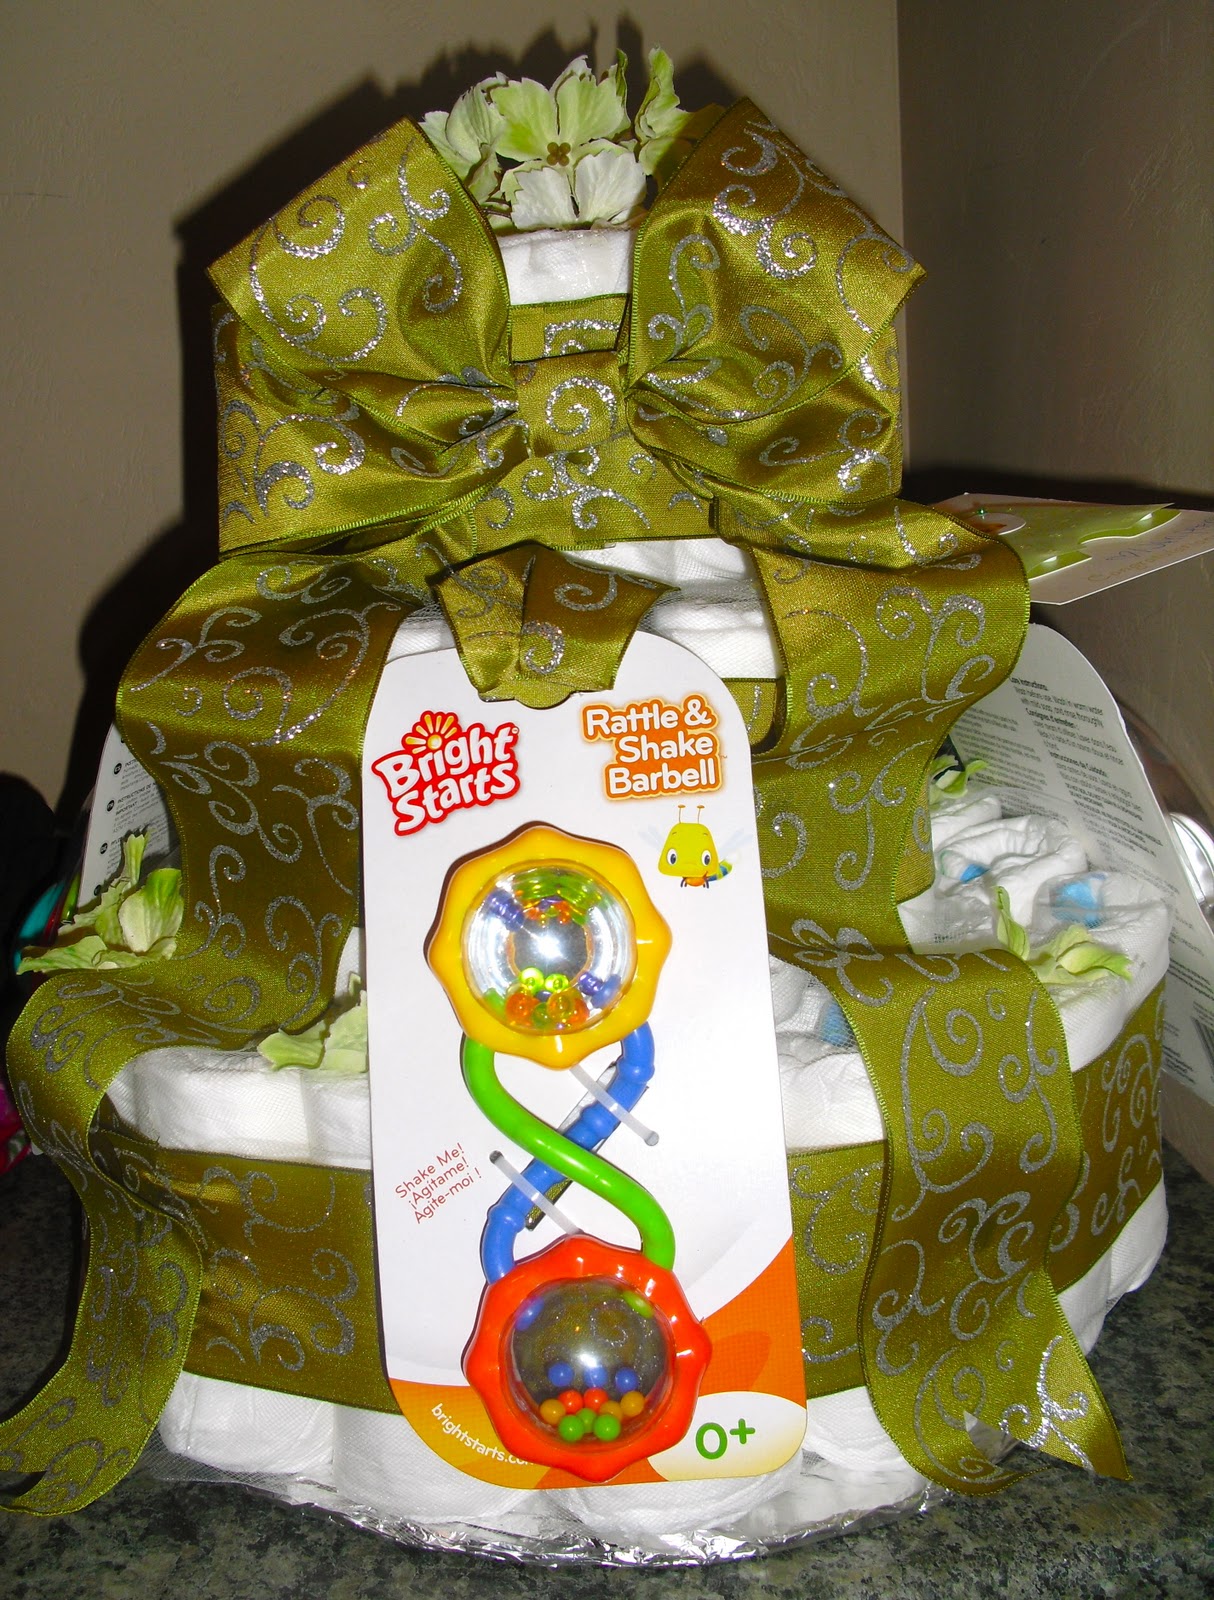
  10. Make and mold three large bows, then glue on the bows to the front of each layer in the center on top of the ribbon you placed in step #9.
  11. To add the toys and other miscellaneous item take 4 inches of ribbon per item and weave it around or through the object to form a loop. Take the cut ends of ribbon and with hot glue tuck them under a layer of ribbon on various locations on the cake.
  12. Finish the cake by adding a few flowers or bows to the tops of each diaper that is exposed. 
  13. Take a good look at your darling creation and be proud to give such a thoughtful gift to the  lucky mother-to-be.
Completion time: 1 hour approx.

I have a very basic cake shown here so feel free to elaborate as necessary or tone it down a bit if you'd like. I am sure there are a lot of great variations of these but this is the one I felt works the best. It makes me excited every time I am invited to a baby shower! Good luck and I hope you enjoy this fun craft!

Sunday, September 19, 2010

Let the Crafting Begin...


In an effort to show my creative side, thus a blog was born! Here I plan to show my fun, creative, sometimes trendy, and most definitely diverse ideas! I am so excited about this new endeavor that I can't put enough emphasis into this post no matter how many exclamation marks I put !!!!!!!!!!!!!!!!!!!!!!!!!!!!!!!!!!!!!!!!!!!!!!!!!!!!!!!!!!! You get the idea... so buckle up and get ready because you are in for a treat! Here is a sample of gift I made for a friend of mine whose Mother died a few weeks ago. 12x12 tile: $2.50, Vinyl cutout made on cri-cut: $3, total cost: $5.50! It was a cute and simple way to say I am so deeply sorry for your loss and here is something to remember her by in a unique way! More ideas to come....

Sunday, June 20, 2010

Patriotic Wall Hanging

I really wanted a unique craft that was themed around our country. I saw this cute saying "The land of the FREE Because of the BRAVE" and fell in love with it! I just turned it into vinyl and applied it to these frames that I found. Here are some of my friends that made some different variations...
 I loved the red!
 This ribbon was so cute!
 Mine was super plain and I loved how cute all of them turned out in the end!
 This one had cute stars on the corner.
 This was meant to sit on a table instead of on the wall. Way cute though!
CAUTION: Crafters at work!

The supplies I used:
*1 unfinished wooden frame
*1 yard of patriotic ribbon
* a 4x6 sheet of scrapbook paper
*3 wooden stars
* white vinyl saying sized to 3x5
*2 feet of thin wire
*hot glue/gun
* red/white/blue craft paint
*paintbrushes
*glue sticks
*wire cutters

Here are the simple steps:
1. Cut and apply scrapbook paper with a glue stick to the card-stock left in the frame.
2. While glue dries, apply 2 coats of craft paint to the wooden frame.
3. While paint dries, apply the vinyl saying to the scrapbook paper (make sure it is centered).
4. Insert the scrapbook paper to the frame and secure with the fasteners.
5. Paint and add the stars to the frame with either hot glue or wire.
6. Hot glue the ribbon on to the back of the frame so you can hang it on the wall(optional).

That's it! Super easy, super cute and super cost-effective!